Why is sterilizing surgical instruments important?
Proper cleaning of surgical instruments literally saves lives. Improperly cleaned instruments can spread bacterial and viral infections that can cause liver failure, severe immune disease, and even death. Cleaning and sterilizing the instruments prevents all this.
Safety Concerns when Cleaning Surgical Instruments
Keep yourself safe too. Wear gloves and eye protection. Don’t accidentally get sick.
Protocol to Clean Surgical Instruments
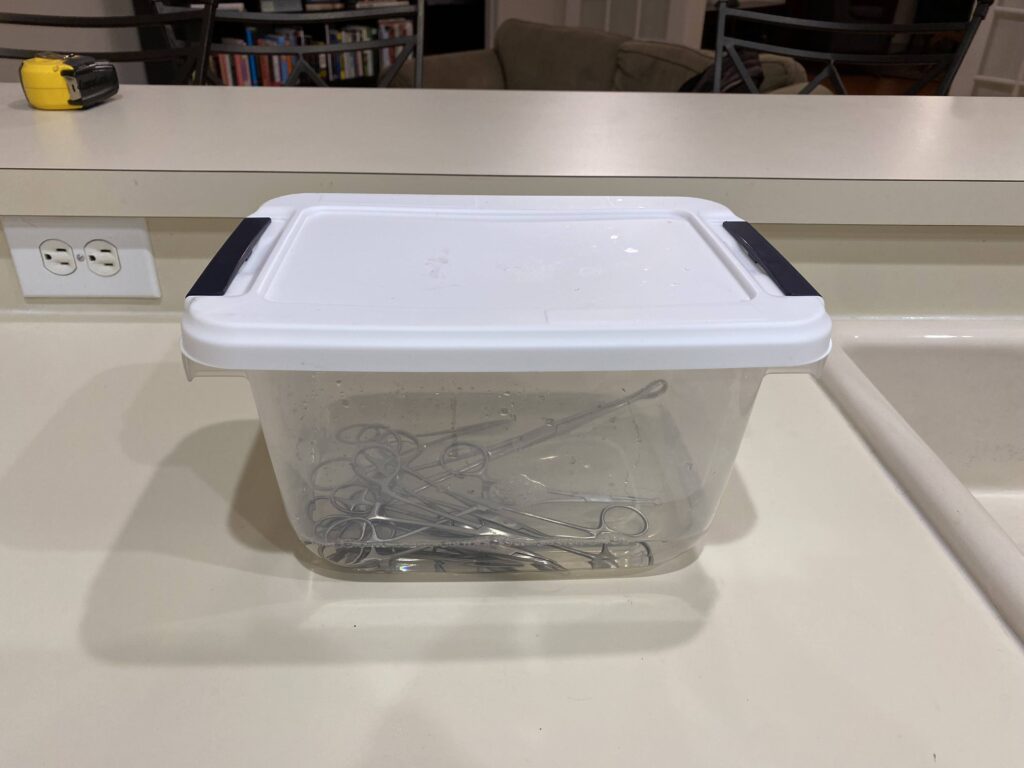
1) Pre-Cleaning
Collect instruments in soapy water in plastic container. This softens up any blood proteins that might have been on the instruments. When placing instruments into the container, be careful with the delicate tips of the dissectors and the delicate blades of the scissors. A fine sharp tip makes the procedure easier for the patient. Protect those tips!
2) Rinse
Rinse the instruments with water to remove any debris and soap.
3) Manual Cleaning
Use a brush and enzymatic cleaner. Immerse instruments in solution of enzymatic cleaner. Use a brush to remove any visible stain. Wear gloves and eye protection to protect yourself from any particles flicked up by the brush.
4) Rinse
Rinse off the enzymatic cleaner and any debris.
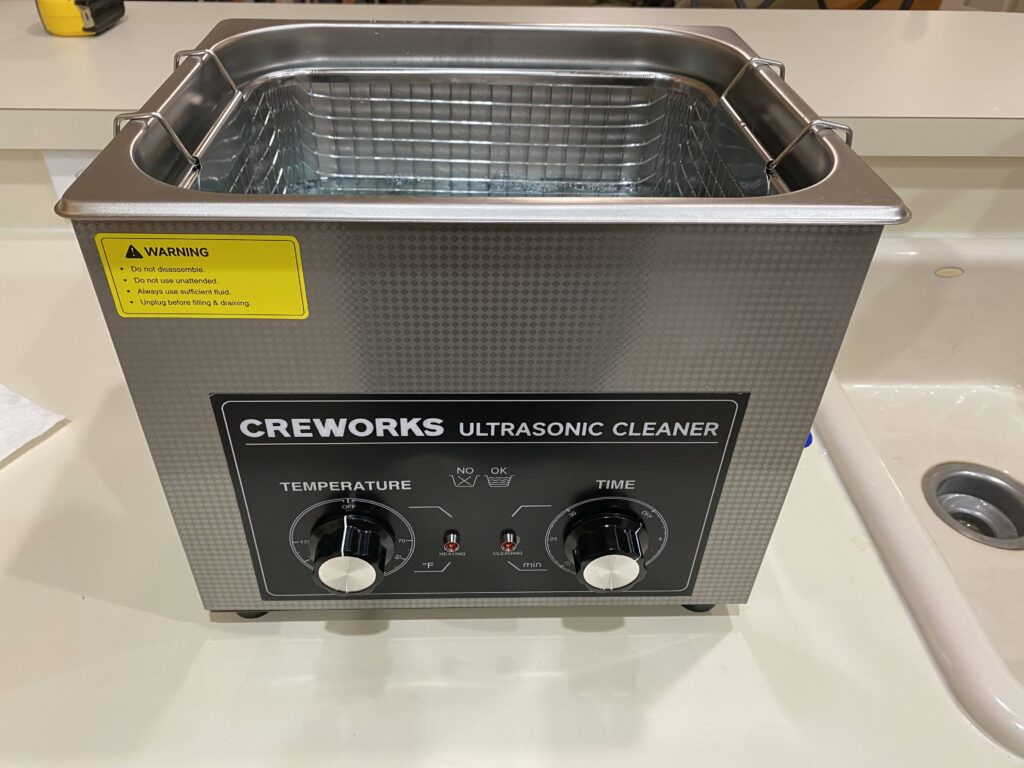
5) Ultrasonic Cleaning
An ultrasonic cleaner uses sound waves to dislodge trace contamination. Use enzymatic cleaning solution in ultrasonic cleaner for enhanced effect. As you place instruments in the basket, be gentle and pay attention to the tips.
6) Final Rinse
Rinse off the enzymatic cleaner. You must rinse well after ultrasonic cleaning since the killed bacteria may have released compounds called endotoxins which can potentially cause an inflammatory reaction.
7) Inspect the Instruments
If any points are look dull or bent, put aside for sharpening. If any hinges are stiff, apply a few drops of “instrument milk” for lubrication. Any lubricant used for surgical instruments must be specifically made for surgical instruments. Normal lubricants have the potential to cause severe inflammatory responses in patients.
8) Dry
Allow to dry before packing. Either hang instruments on a rack, dry in a mesh basket, or dry on a dust-free surface. You can use a hair-dryer to speed up the drying process.
9) Pack Instruments
The packing material must be made from material that allows steam penetration. As you pack, use “steam indicator tape” to make sure that it is clear which packs have been autoclaved.
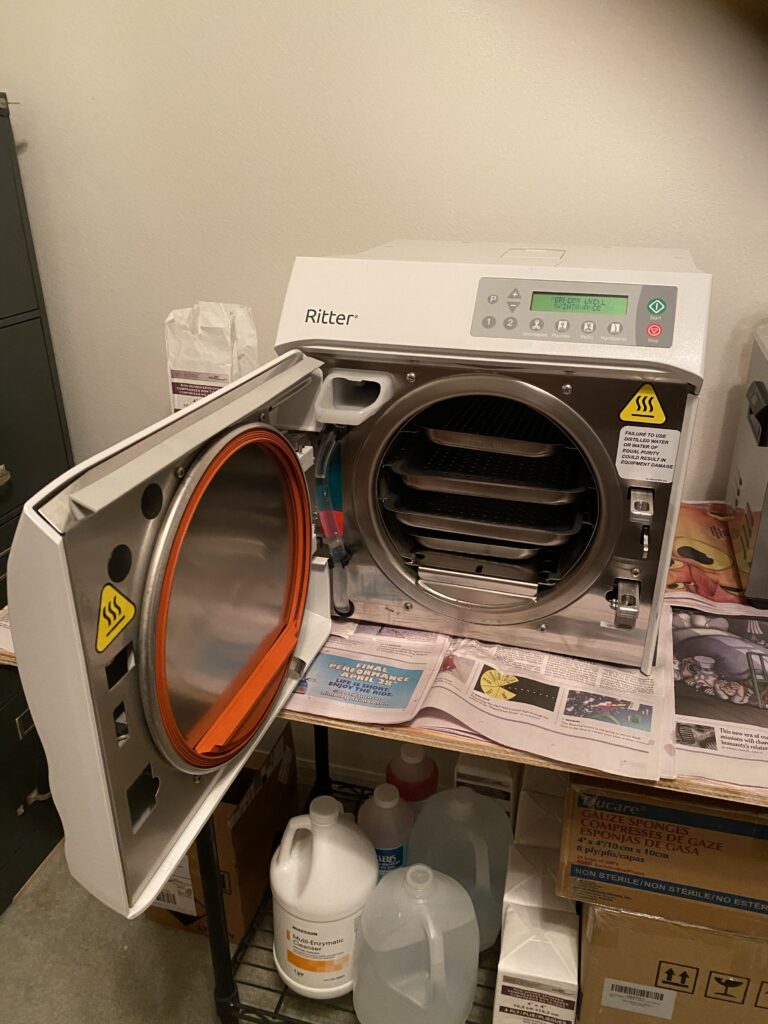
10) Autoclave Instruments
Place the packed instruments in autoclave. Use the perforated trays, and stack loosely with plenty of room for the steam to penetrate into the packs. Run an autoclave cycle for “packs.” This longer cycle gives time for the steam to penetrate and kill bacteria and viruses. For information about running and maintaining the autoclave, click here for the Ritter Midmark M9 Manual
11) Dry the Sterile Instruments
You can use the “dry cycle” in the autoclave or place the packs on a clean wire rack for good air flow.
12) Storing Sterile Instruments
Store packs in clean, dry environment. Use a plastic bin to hold packs so nothing accidentally punctures the pack wrapping.